Login and go to the Dashboard The Admin has rights to add students and also assign rights to coaches to add students. From your dashboard, click on the “Students” section.
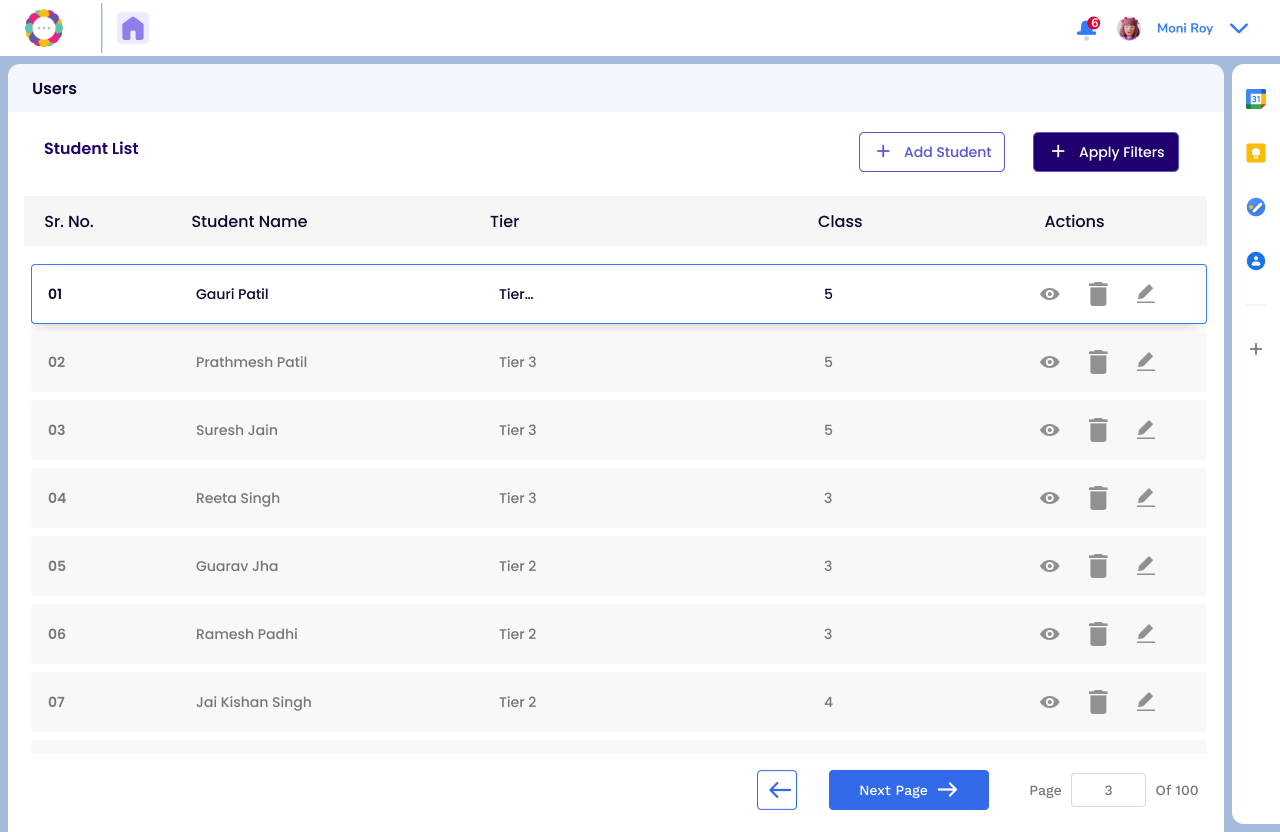
Click the “View All” link This will open the student management page where you can view existing students and add new ones.
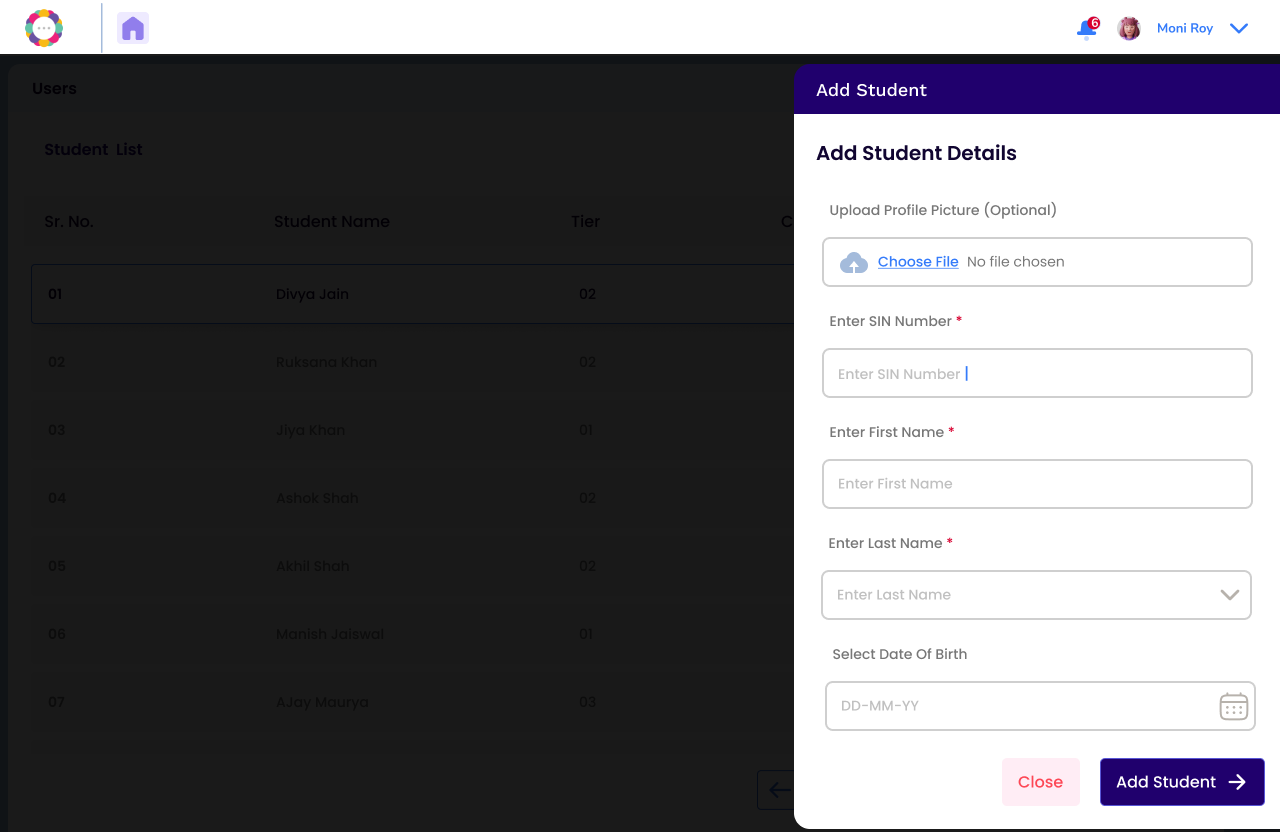
Click on “Add Student” You’ll be taken to a form where you can enter the student’s details such as name, age, grade, assigned coach, and other relevant information.
Save the Details Once completed, click “Save” to add the student to the portal. The student profile will now be visible in the list.
When adding a new student, users are required to provide the following mandatory details:
SIN Number – (Any alphanumeric number)
Student Email ID
Student First Name
Student Last Name
Parent Name
Parent Email ID
Date of birth
Gender
Class
Division
Religion
Mother Tongue
Spoken Language
Zipcode
Address
Country
Bulk upload student data
Click on the import student data button to add multiple students
Download the sample template to ensure your data is formatted correctly.
Upload your student data file (CSV or Excel) using the provided upload option.
Preview the entries before confirming the import.
Submit to bulk add multiple students into the portal seamlessly.
How to update student details
After clicking the “Update Student” icon next to a student’s name, you will be directed to the edit the student’s profile.
On this page, you can:
View and modify existing student details such as name, age, grade, assigned coach, or program type.
Update contact information and learning needs, if required.
Save changes by clicking the “Update” or “Save” button at the bottom of the form.
All updates are reflected immediately in the student dashboard and coach view.
How to delete a student
To remove a student from the portal:
Click on the “Delete” icon next to the student’s name in the student list.
A confirmation prompt will appear to ensure the action is intentional.
Click “Yes” to confirm and permanently delete the student’s details from the system.
⚠️ Note: This action is irreversible. Make sure to double-check before proceeding.
Once you confirm, the database will be updated with the changes.
Use Filter to search for select data
Go to the Student List page
Click on Apply Filter.
Fill the data by which you want to filter.
The filtered options will be displayed on the screen.